DIY / framed coin pouch

coin_pouch_9

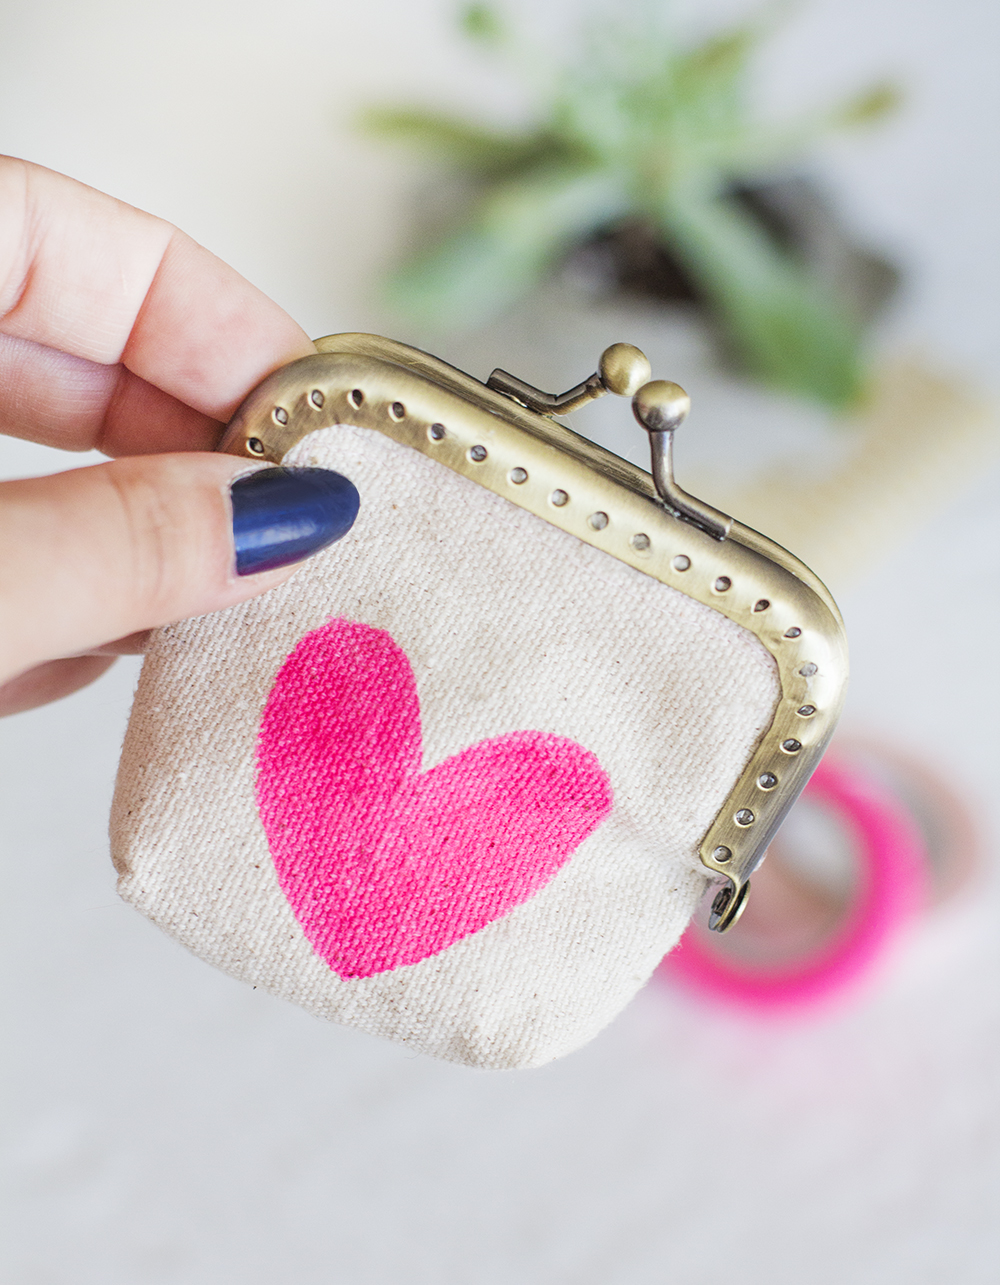
Don’t you, sometimes, want to take a break from your big wallet full of tickets, old receipt, useless cards and whatnots? A coin pouch is the perfect alternative for those times when you just want to grab an ice cream cone or go see a movie with your girl friends. Today, I am showing you how to make the cutest girly coin pouch, that you can also use as a jewelry keepsafe or whatever small precious things you want to carry!
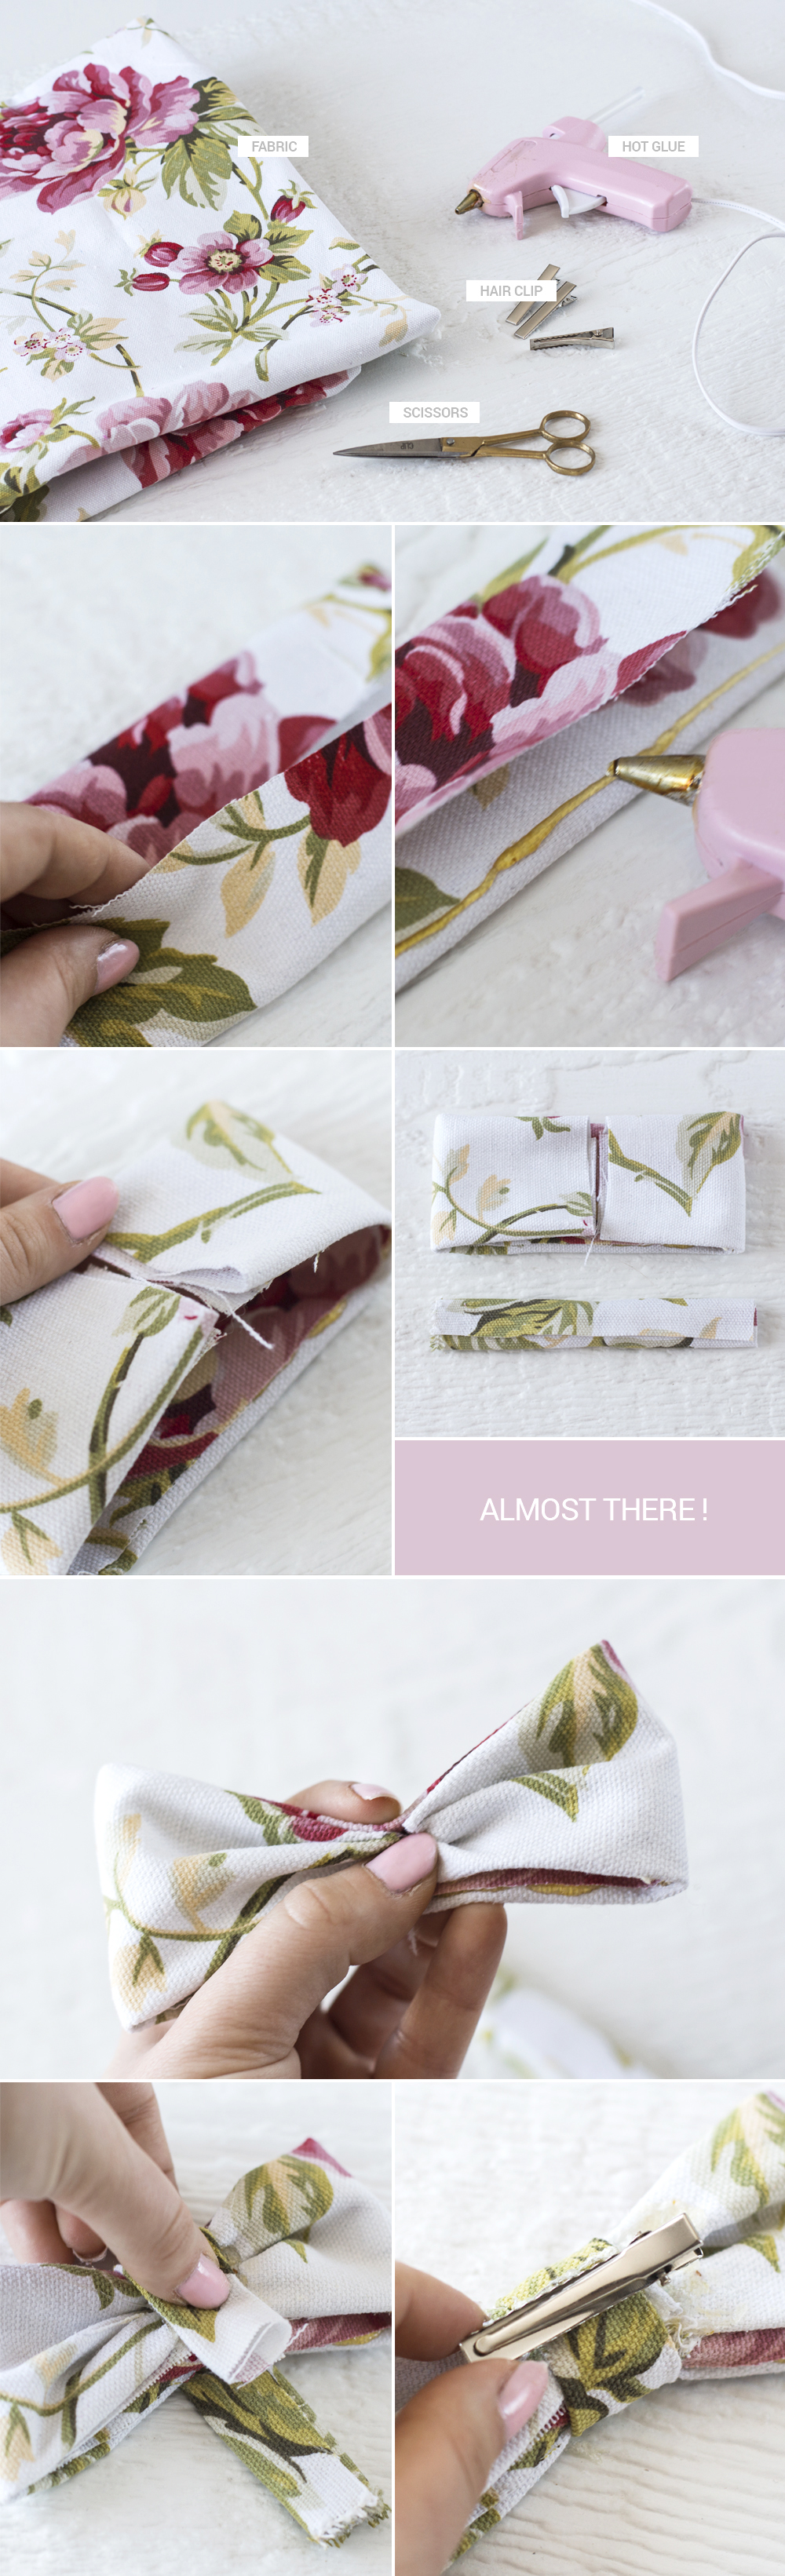
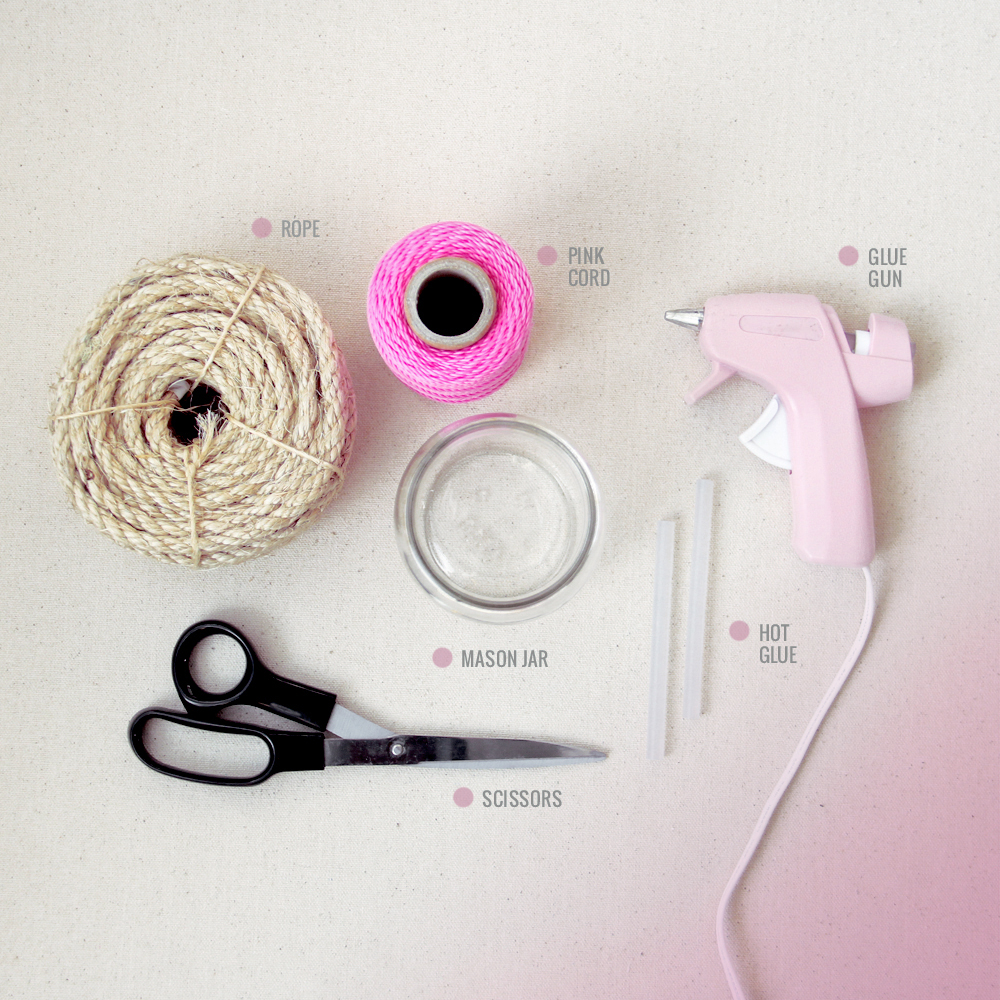
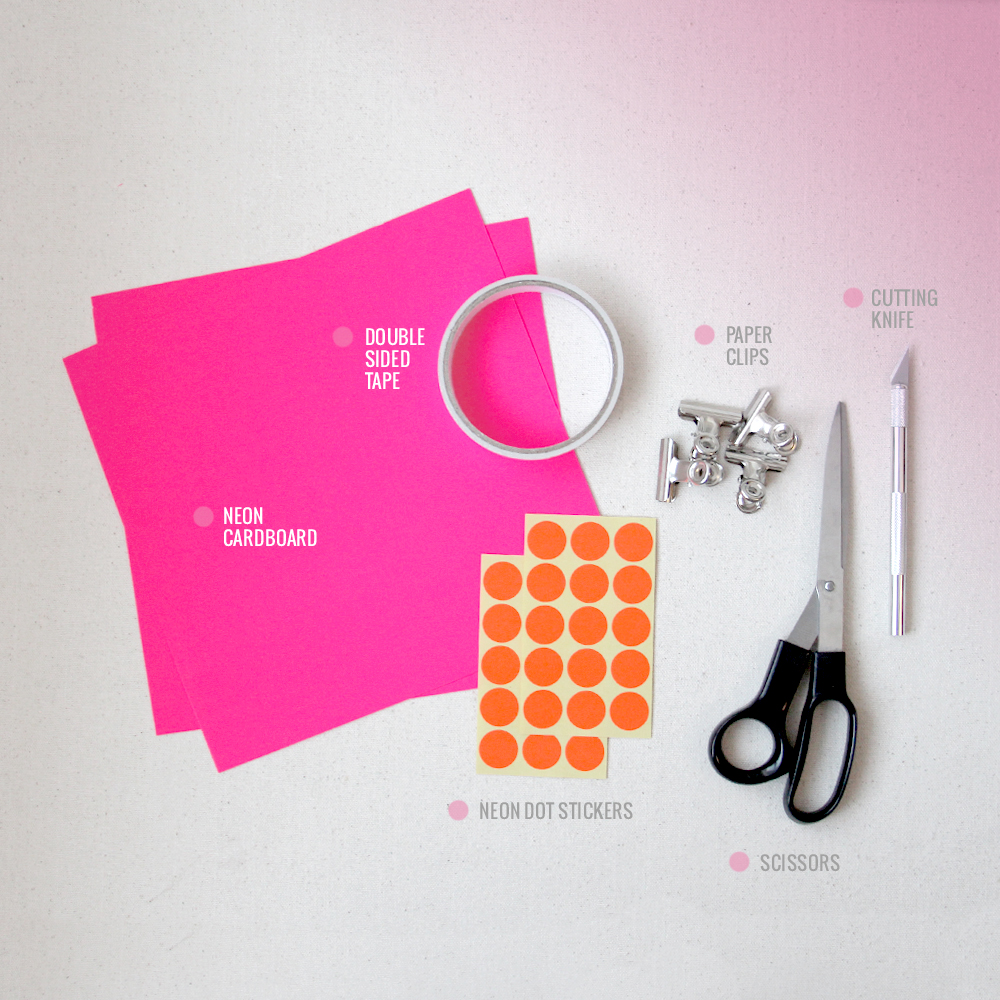
WHAT YOU NEED:

  • canvas fabric (+ cotton for liner)
  • 7,5 cm purse frame (I used this one)
  • acrylic paint + textile medium
  • paint brush
  • pliers
  • scissors
  • glue gun + hot glue
CRAFT IT:
  • Cut out 2 square of fabric (3,5″ x 3.5″)
  • Paint a heart on one (or two) of the squares. (mix acrylic paint with textile medium following the directions on the bottle)
  • Place the fabric squares face to face and sew like shown below. Cut out the corners.
  • Pinch the corners like shown and sew it down like shown (kind of hard to explain!).
  • Do the exact same thing with a patterned cotton fabric for liner.
  • Place the linen piece inside the other, and sew together.
  • Use hot glue to fix the metal frame in place. Use a butter knife or pointed object to help stick fabric into it. Clean glue excess if there is.

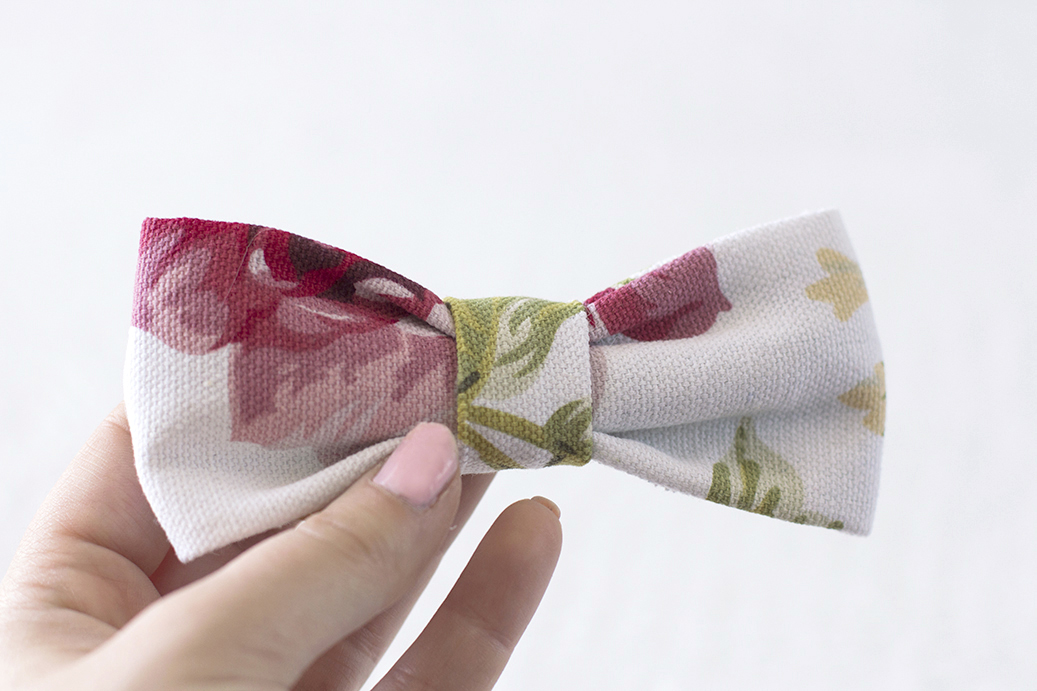
That’s it! You’ve got the cutest mini pouch to carry your precious coins around !

3914564

Let me know if your make one !

M_sign

DIY / Daisies floral crown

daisies crown

We don’t mean to reinvent the wheel, but we couldn’t keep ourselves from having our own DIY version of floral crown here for spring. This season calls for sunny outfits, and what’s better than daisies to brighten up your look! You might actually think it is too long or too complicated to make a cute floral crown but actually, it doesn’t take more than 15 minutes and doesn’t cost more than 10$ (unless of course you buy very expensive silk flowers). Here’s how:

WHAT YOU NEED:

  • silk daisies (or any flower you prefer)
  • floral tape
  • metal wire
  • pliers
  • scissors
CRAFT IT:
  • First of all, wrap the wire or wires if your used 2 pre-cut like us) in floral tape. This tape is slightly sticky, so you have to wrap it tightly. Don’t worry if you don’t get it right at first!
  • Once this is done, make a nice circle with it, measuring with your head. Don’t make it too tight because flowers will take some place. Cut the wire excess, and wrap the edge in floral tape so you won’t hurt yourself.
  • Cut flowers from the bunch using the cutting part of pliers.
  • Attach flowers to the wire circle one after the other using floral tape until the whole circle is filled.

That’s it! You’re ready to be dazzlingly pretty with this floral headpiece of yours!

crowndaisies crowndaisies crown

Oh and, you can also make a smaller version for you dog ;) Extra cuteness guaranteed!

terreur_couronne_1(small)

Hope you guys like our version of floral crown! & Let us know if you make one!

M_signTania signature

DIY / No sew bow tie

I’ve been obsessed with bow ties for quite a while now. I just love how it adds a cute and unexpected touch to an outfit. It’s fun, and they can be made of soooo many fabrics and patterns! Another great reason to love them. Wholeport sent me a great floral canvas fabric so I decided it was about time I crafted one by myself. To make it as easy and fast as possible, I decided to make a DIY no-sew version of it. Here’s how to do it:

bowtie1

WHAT YOU NEED:  
  • a nice fabric (you can buy mine here)
  • a glue gun + hot glue sticks
  • hair clips (those are perfect)
  • scissors
CRAFT IT:
  • First of all, cut two pieces of fabric. One that measures about 10 x 6 inches, and a small one about 5 x 2 inches.
  • Fold the bigger piece into thirds lengthwise and glue it. Do the exact same thing with the smaller piece.
  • Take each end (bigger piece) and fold them in so they meet in the middle.
  • Pinch the larger piece to make a bow shape and put a drop of glue in the crease so that the fold stays put.
  • Next, take the smaller piece of fabric, then wrap it around the bow and glue it together in the back.
    Add a hair clip and you’re done!

DIY_Bowtie

That’s it! Your own ready-to-wear bow-tie. Now you can make them in any color/pattern you love.  

bowtie_3bowtie_2

I proudly partnered with Wholeport to create this post. Visit their website for tons of craft supplies.

logo

First and last photo by Pier-Luc Cossette

M_sign

DIY / cute collared dress

collar_1

I’ve been hooked on collared dress for a while. I just love how a cute collar can somehow make a simple outfit so glamorous. When Wholeport sent me over this crocheted lace collar, I was very excited about making myself a new piece of clothing. At first, I wanted to put it on a basic T-Shirt but then I thought a dress would be best for summer. My only problem then was finding a dress with a crew neck! I found this one for few dollars (15 if I remember!) at H&M. Now this might just be my new favorite summer dress! Here’s how to make one on your own:

DIY_1_collar

WHAT YOU NEED:
  • crocheted lace collar or similar
  • a basic crew neck dress
  • assorted thread
  • sewing pins
  • a sewing needle
CRAFT IT:
  • First of all, choose a dress with a crew neck. Anything too low-necked won’t work. Better with a simple fabric too.
  • Place the collar around the neck and fix it with sewing pins. Make sure it is well centered as well!
  • Sew it with small invisible stiches (as much as possible), using matching thread.
  • As simple as that! Wear you new dress like a lady !

What do you think? Will you embellish your own dress?

3244638collar_3

Photos of me by Xavier Staquet.

I proudly partnered with Wholeport to create this post. Visit their website for tons of craft supplies.

logo

M_sign

DIY / glitter hair clip

clip_2DIY_1

I’ve been looking for glitter hair clips for a while before I realize I could just make them on my own. In fact, it is one of the simplest craft I’ve made and the result is sooo charming! Exactly what I was looking for! Now, here’s how:

WHAT YOU NEED:
  • Flat metal hair clips (I used them)
  • Gold glitters
  • Double-sided tape
  • Scissors
  • Nail Top Coat
CRAFT IT:
  • Cut a piece of double-sided tape, and stick it to the flat side of the clip.
  • Trim the excess of the tape with scissors.
  • Peel the paper from the tape. Watch out, this is very sticky!
  • Dip the clip up-side down in a bowl of glitters. Make sure all the surface is covered.
  • Shake of the excess.
  • Apply Top Coat all over the glitters and let dry for few hours. This will give it a nice glossy protection, and the glitters won’t fall off.

So, will you try this at home? Let me know!

3207111

I proudly partnered with Wholeport to create this post. Visit their website for tons of craft supplies.

logo

M_sign

DIY / tie dye scarf

Scarf_2

This is no secret, tie-dye has been a huge trend lately. I didn’t own anything tie-dye yet, so when my friend Marie Pier talked me into making our own tie-dye scarf I jumped on the idea. It is a pretty simple project but the results are just stunning! The most important thing before you start is looking for fabric that will dye (or bleach in that case). In order to have that, it has to be natural fabric like cotton, linen, silk or rayon. Acrylic will not dye. Carefully read the label before getting started. Now, here’s how:

WHAT YOU NEED:
  • A black scarf
  • Liquid bleach
  • Water
  • Vinegar
  • Container
  • Rubber gloves
  • Plastic ribbon
CRAFT IT:
  • Bunch the scarf and wrap it all over with plastic ribbons.
  • Display it in a safe container. It’s important that you don’t have any bleach getting on your clothes. You might want to dress up in old clothes for this, just in case!
  • Pour solution of diluted bleach (with water) on the scarf ball. Try different proportion of water and bleach to have different shades. Make sure you turn the bunch over and pour some on each side. Wait a few minutes between each pouring. You will see it change magically in just a few seconds.
  • Once you have a great color change, rinse the bunch with water and put it in a bowl of diluted vinegar. This will fix the color.
  • Wash it and dry it. (I washed it alone in my machines)
  • Proudly wear your homemade trendy scarf!

There is no garanty of what you will get. As you can see, one of our scarf ended up orange and the other one more yellow. It think this is what’s fun about this project. You don’t know exactly how it will turn out, but the results are awesome! You can now tie-dye everyhting you want as long as you follow the main rule; look for natural fabric!

foulard_makingScarf_1

So have you tried making you own scarf? How did it turn out?

M_sign

DIY / tulle pom flowers

Flowers_111flower21

Lately, I’ve been giving my living room a new look for springtime, with warm color accents. (I don’t know if I’ll ever be able to settle on a color combination, it feels like it will be constantly changing!) I love looking for new prints furnitures, flowers.. I love displaying flowers in a room. It just feels more inhabited. Since i’m a very bad plant keeper, and they all sadly end up in the garbage, I mostly use artificial flowers. Now that my new color accent are neon pink and orange, I thought why not make pom flowers with tulle! Here is a very easy way to make them and embellish your space:

WHAT YOU NEED:
  • Tulle, in several colors
  • Dry branches
  • Thread
  • Scissors
CRAFT IT:
  • Cut 2 inches strips out of your tulle fabric.
  • Wrap it around your hand (like shown above). You might need several strips to have a thick pom.
  • Slide it off your hand and tie a knot in the middle. (You get something close to a bow)
  • Slide you scissors into each loop and cut it.
  • You get a quite messy pom. All you need to do is trim it a little bit.
  • Once you have the cutest tulle pom, insert it on the tip of a branch, and display your flowers in a cute vase.

3052693flower_3

Let me know if you make them! I’d like to know where you displayed them!

M_sign

DIY / rope pencil pot

DIY_first DIY_2

Today, I am showing you a very quick and easy DIY project to give your desk a charming storage piece, in just a few minutes.

WHAT YOU NEED:
  • Rope
  • Pink cord
  • A Mason jar
  • Scissors
  • Glue gun
  • Hot glue sticks
CRAFT IT:
  • Thightly wrap the rope around the mason and fix it with hot glue.
    (Hot glue sticks very well on glass jars)
  • When the jar in completely wrapped in rope, cut it and fix the extremity with some more hot glue.
  • Now, randomly wrap a pink cord on the rope, by fixing its extremities only (still with hot glue)
  • You are already done. Just put the metal rim back and you have a charming home for you pens and pencils!

DIY_both

M_sign

DIY / Colored edge coasters

coasters_DIY_1coaster_DIY_2

Is your table seriously bored with your old tableclothes and dinnerware? Give it something refreshing and colorful with this easy coaster project!

WHAT YOU NEED:
  • A thick corkboard sheet
  • Colorful acrylic paint
  • Masking tape
  • Paintbrushes
  • Ruler
  • Cutting knife
CRAFT IT:
  • Cut equilateral triangles out of the corkboard sheet.
    (Previously draw a triangle in the desired size on a paper sheet and cut it out.
    Use it as a guide to draw on the corkboard, and cut them out gently with a sharp cutting knife.)
  • Use masking tape to delimit the edges of the coasters.
  • Paint only the edge using vibrant acrylic paint. Apply  2 or 3 layers of paint.
  • Once the paint is dry, gently tear off the masking tape.
  • You now have the cutest colorful coasters for your friends gathering and sunday mornings!

coasters_DIY_3

M_sign C

DIY / neon treat box

DIY_13DIY_2(box)

Valentine’s day is just around the corner and you want to tell your friends how special they are to you? You gotta give them something handmade. The cutest mark of attention is to receive something that someone made, isn’t it? This is my favorite DIY project this month. Me and Chloe had lot of fun doing it. And my camera had a lot of difficulty trying to capture the brightness of the cardboard, but anyway ! Here’s how to make those:

WHAT YOU NEED:
  • Neon cardboard
  • Neon dot stickers
  • Double-sided tape
  • Paper clips
  • Cutting knife
  • Scissors
CRAFT IT:
  • Start by uploading the pattern here.
  • Print it on a paper sheet and fix it to your neon cardboard with paper clips.
  • Cut out the shape in the cardboard with scissors or a cutting knife.
  • Place dot stickers randomly all over the surface. Cut out the excess.
  • Cut the handle holes and the heart with the cutting knife. (If you don’t feel confident enough, you can forget the heart. You have to be quite precise for that part)
  • Score the dashed lines with a very small pressure on your cutting knife.
  • Fold it like shown above, and fix the side with double-sided tape.
  • You now have the cutest neon treat box to impress your friends!

2717204DIY_4

Hope you had a lot of fun doing this cute project! We would looove to see your creations!

M_signC