I’ve been obsessed with bow ties for quite a while now. I just love how it adds a cute and unexpected touch to an outfit. It’s fun, and they can be made of soooo many fabrics and patterns! Another great reason to love them. Wholeport sent me a great floral canvas fabric so I decided it was about time I crafted one by myself. To make it as easy and fast as possible, I decided to make a DIY no-sew version of it. Here’s how to do it:

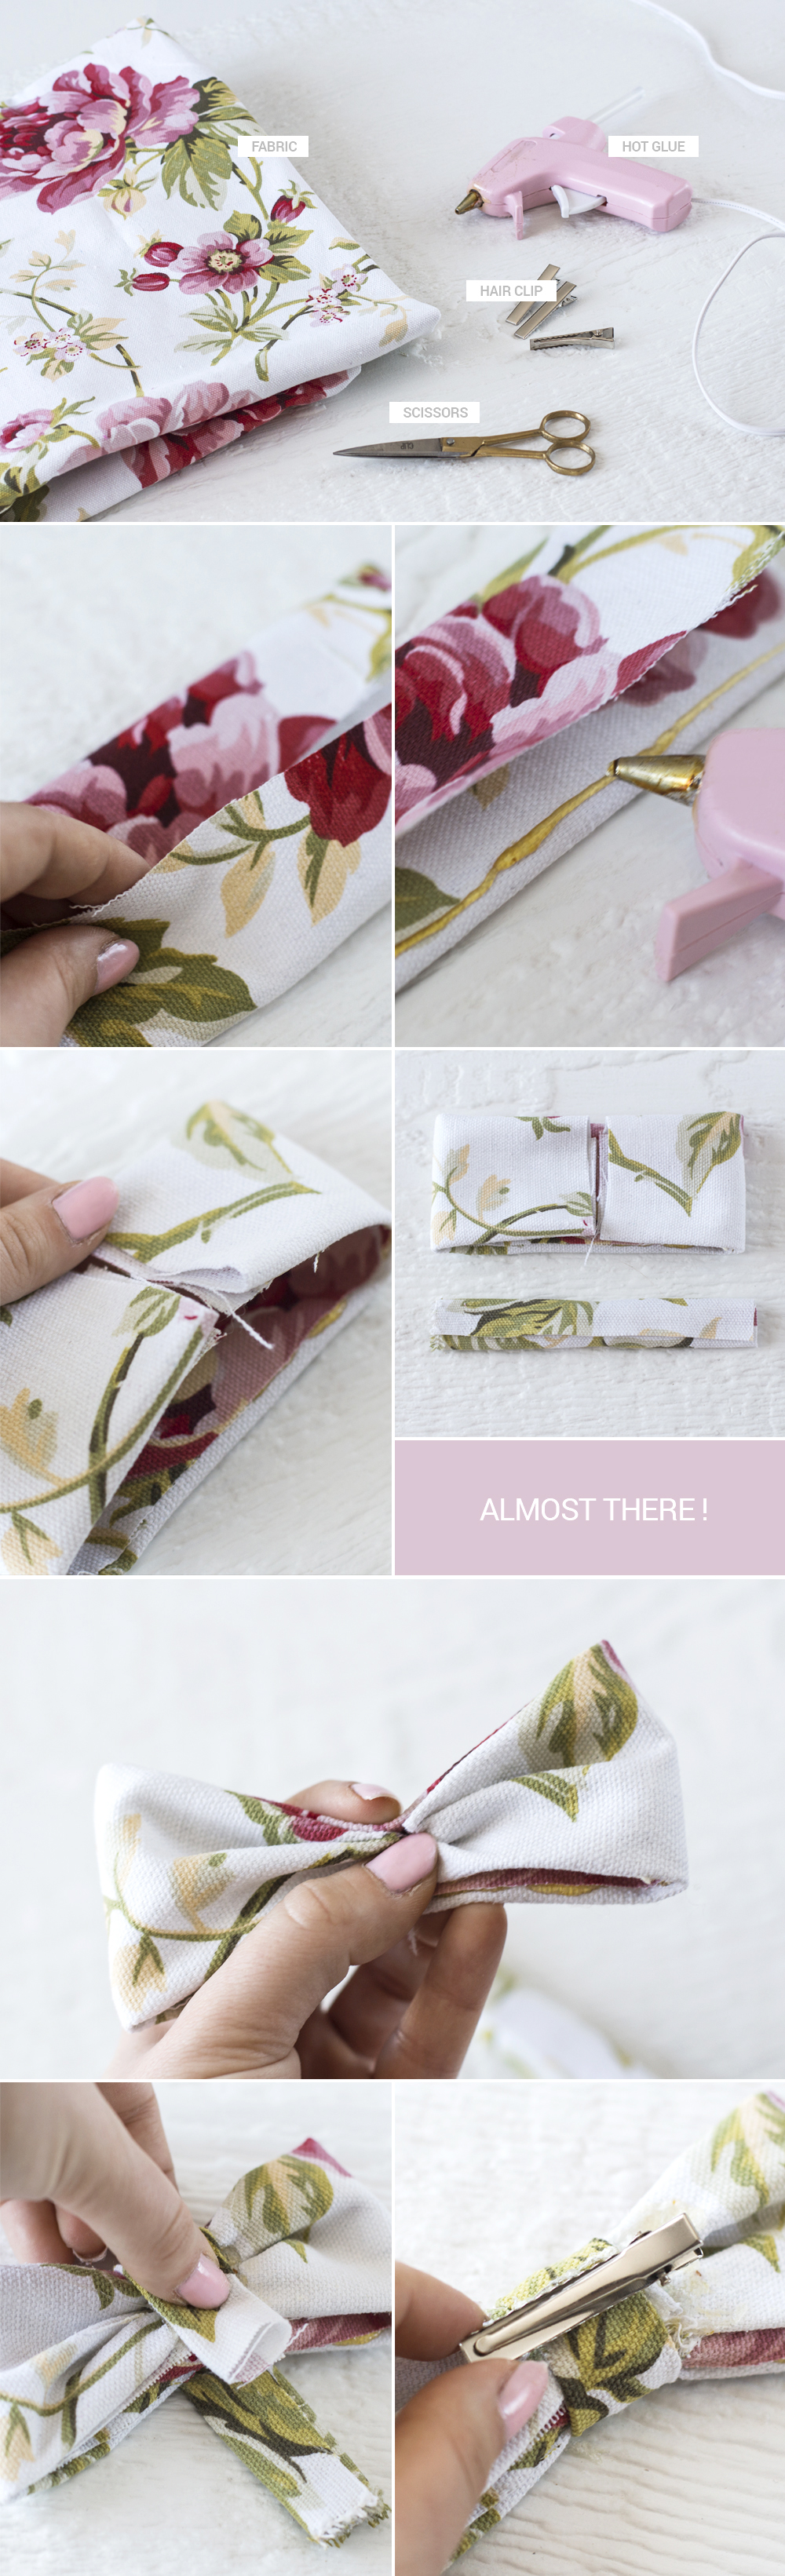
WHAT YOU NEED:
- a nice fabric (you can buy mine here)
- a glue gun + hot glue sticks
- hair clips (those are perfect)
- scissors
CRAFT IT:
- First of all, cut two pieces of fabric. One that measures about 10 x 6 inches, and a small one about 5 x 2 inches.
- Fold the bigger piece into thirds lengthwise and glue it. Do the exact same thing with the smaller piece.
- Take each end (bigger piece) and fold them in so they meet in the middle.
- Pinch the larger piece to make a bow shape and put a drop of glue in the crease so that the fold stays put.
- Next, take the smaller piece of fabric, then wrap it around the bow and glue it together in the back.
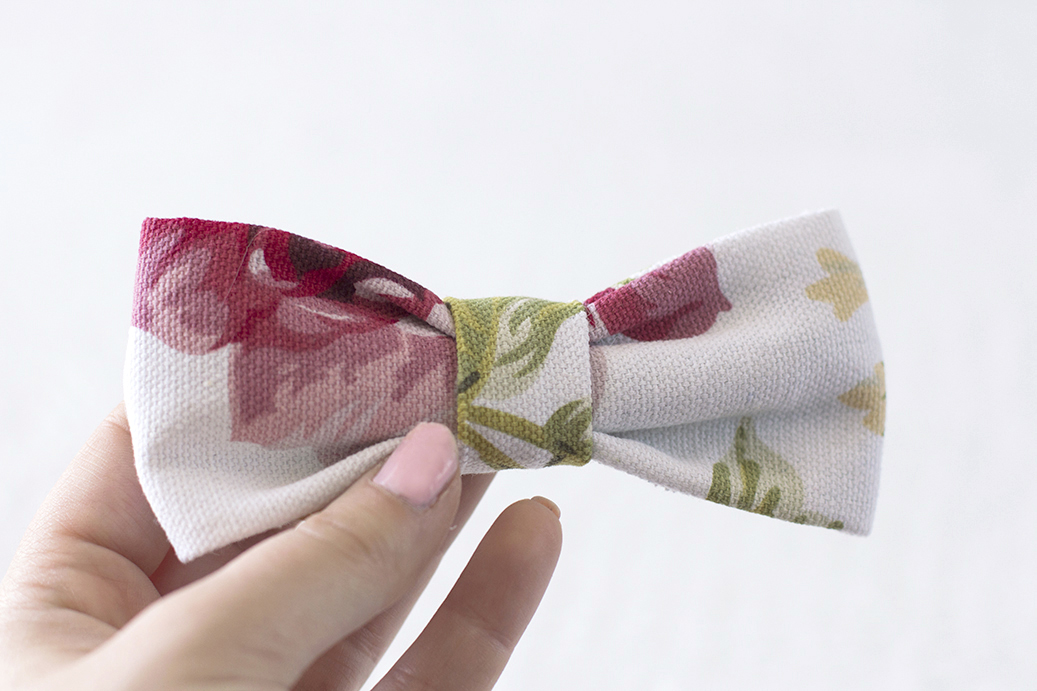
Add a hair clip and you’re done!
That’s it! Your own ready-to-wear bow-tie. Now you can make them in any color/pattern you love.

I proudly partnered with Wholeport to create this post. Visit their website for tons of craft supplies.
![]()
First and last photo by Pier-Luc Cossette


Fun little d.i.y! You had me at “no sew.” ;)
The bow is very cute!